— Configure Notification — Type of Notification —
Configure Notifications
Type of Notification
The following types of notifications are available for configuration in a task —
- Network Client notification launches the camera in alarm (when applicable) video stream along with alarm information and alarm video access, to the defined DETEXI Client computer. Alternatively, sends a user-defined message to be displayed on this computer, disregarding any alarm-specific information.
- Phone notification calls a user-defined phone or pager and plays alarm-specific or a user-defined WAV file or text-to-speech message. Has the ability to attempt multiple times on failure.
- eMail notification sends an alarm-specific or user-defined email to one or more user-defined email addresses. Has the ability to attempt multiple times on failure.
- Speak notification plays alarm-specific or a user-defined WAV file or text-to-speech message over the NVR Server soundcard.
To add new notification to a previously created task —
Add Notification —
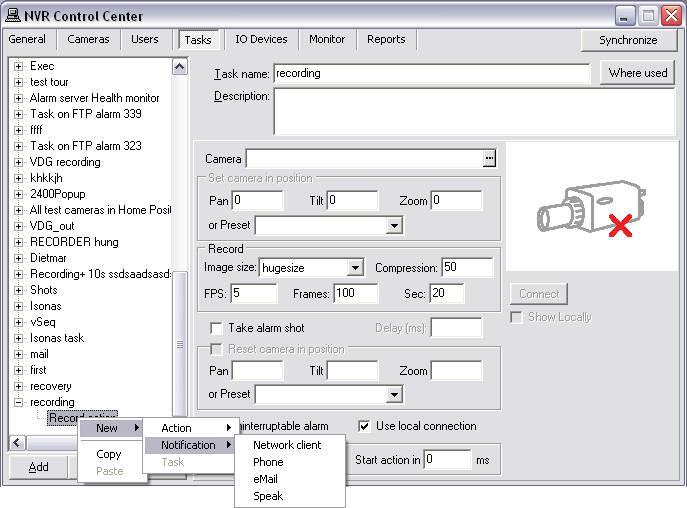
- If New — Notification option was selected, the notifications menu appears.
- Select the notification to configure — Network Client, Phone, eMail or Speak — right panel will be populated with configuration settings specific to this notification.
- Configure the selected notification and click Save button under the Task list to save the task configuration.
- To add more actions/notifications to the task — with the same task selected in the Task list, right-click and choose New — Action or New — Notification option to add one more action/ notification to that task.
— Configure Notification — Network Client —
Configure Notification
Network Client
- Network Client notification launches the camera in alarm (when applicable) video stream along with alarm information and alarm video access, to the defined DETEXI Client computer. Alternatively, sends a user-defined message to be displayed on this computer, disregarding any alarm-specific information.
When
New — Notification — Network Client is selected the right panel will be populated with configuration settings specific to the
Network Client notification.
Configure the notification —
- Configure Network Client
- Message
- Video Popup
- Alarms List
- Get Alarm Video
- Client Settings
When the trigger condition is met a
Network Client notification alerts an operator on the defined DETEXI Client computer by two different ways:
- If the Message can be changed automatically checkbox is checked — launches the camera in alarm video stream along with alarm information and alarm video access (if alarm video recording was configured in the task).
- If the Message can be changed automatically checkbox is unchecked — sends a user-defined message to be displayed.
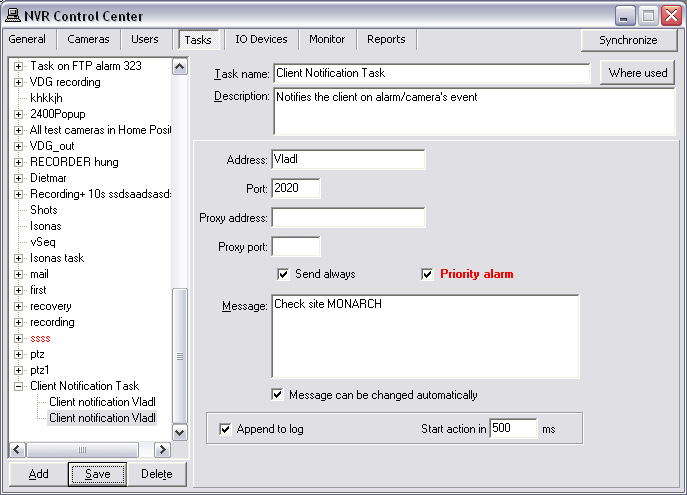
To configure the notification —
- Setup an operator terminal Address and Port number.
- Setup also Proxy Address and Proxy Port if necessary.
- The Send always checkbox can be checked.
- Multiple Network Client notifications can be created under one task.
- If the Send always checkbox is checked the notification always initiates, if not — just in case the checked notification failed.
- At least one Send always checkbox must be checked in a task notifications.
- Check the Priority alarm checkbox to add new alarm information on the top of the Alarms list otherwise it will be appended to the bottom.
- Enter a message to the Message text box.
- Depending on the response you desire the Message can be changed automatically checkbox can be checked or unchecked.
- Check Append to log checkbox to append notification specific information to the existing log file each time when Network Client notification is initiated (optional).
- If necessary, enter a Start action in time(ms) — a delay between trigger condition detection and action initialization.
- In order to provide access control and activity (audit) logging the information about any action or notification initiated in the system can be appended to the system log.
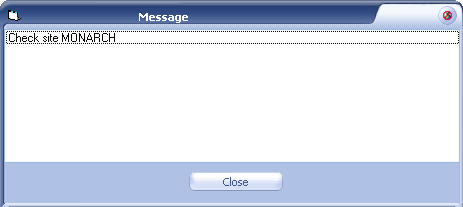
If the
Message can be changed automatically checkbox was
unchecked —
the
Network Client notification alerts an operator on the defined DETEXI Client computer by sending a user-defined message, disregarding any alarm-specific information.
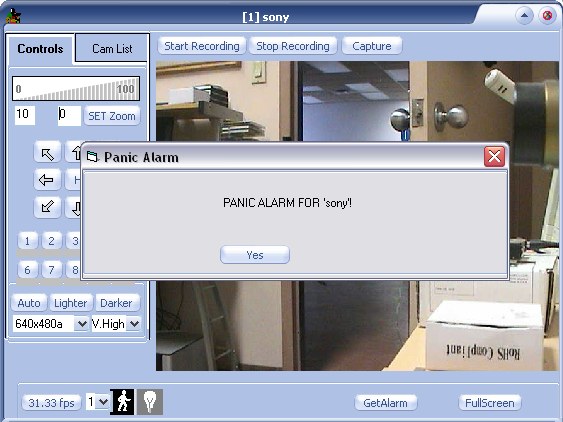
If the
Message can be changed automatically checkbox was
checked —
the
Network Client notification alerts operator on the defined DETEXI Client computer:
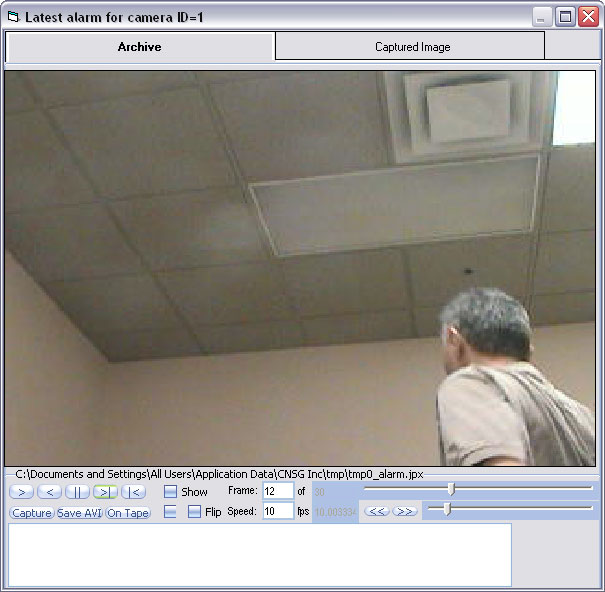
- Launches the camera in alarm video stream. Video popup window is identical to the DETEXI Client single camera live view and has the same navigation and other capabilities as if operator launched this view.
- Pops up alarm-specific information window and speaks the information.
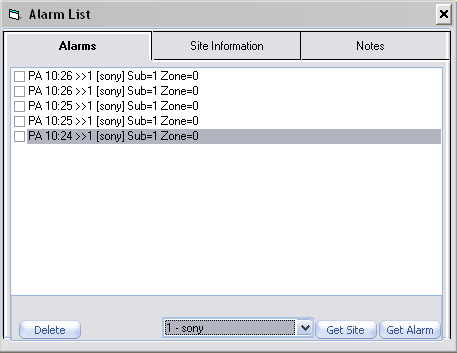
- Adds alarm information to the Alarms List and pops up the list.
- Provides access to the recorded alarm video ( Get Alarm button). If alarm video recording was configured in the task (Record Video action), recording starts immediately at the moment alarm was detected.
This allows remote monitoring stations (Remote DETEXI Clients) to become immediately aware of a change in a monitored environment and respond to things that occur.
To launch a live video popup from the alarms window —
- Select a camera from the cameras drop-down list at the bottom.
- Click the Get Site button.
To launch an alarm video from the alarms window —
- Select an alarm from the alarms list.
- Click the Get Alarm button.
- When Network Client notification adds new alarm information to the Alarms List it goes to the top of the list if the Priority alarm checkbox was checked, otherwise it will be appended to the bottom.
- Verified alarms could be check marked. A check marked alarm gets "resolved" status (useful for operators).
- The Delete button deletes any selected alarm from the alarms list disregarding status.
Clicking the
Get Alarm button from the video popup window or alarms window launches the DETEXI Archive Viewer playing the recorded
alarm video.
- If alarm video recording was configured in the task (Record Video action), recording starts immediately at the moment alarm was detected.
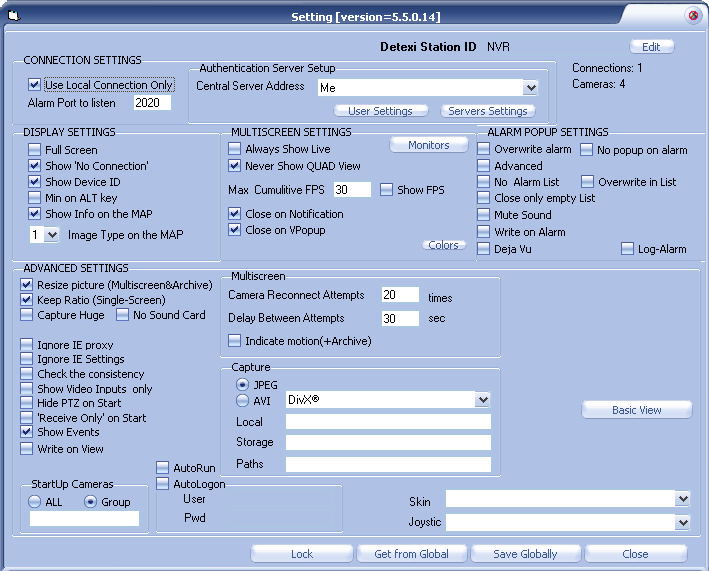
The DETEXI Client priority
alarm popup settings allow an operator on the Client computer to change the way the Network Client notifications alert the operator
(for this Client only). In the
DETEXI Client — Advanced Settings under the
ALARM POPUP SETTINGS check/uncheck the following checkboxes —
- Uncheck the Overwrite alarm checkbox to prevent a current live video popup from the interruption by a new alarm video.
- Check the Advanced checkbox — the alarm popup information (including live and recorded alarm video) shows up on the screen in a fixed full screen layout (eliminates windows overlapping).
- If the No Alarm List checkbox is checked, the Alarms List will not pop up on alarms.
- If the Close only empty list checkbox is checked, the Alarms List will be prevented from closing until all alarms in the list are check marked as "resolved" or deleted.
- Check the Mute sound checkbox — speak a message will be prohibited.
- If the Write on Alarm checkbox is checked — recording starts locally (on the Client computer) immediately at the moment alarm was detected until defined time expires.
- Check the No popup on alarm checkbox — alarm popup will be prohibited.
- If the Write on Alarm checkbox is checked — recording starts locally (on the Client computer) immediately at the moment alarm was detected until defined time expires.
- If a recording time was not defined (0), the recording will continue until the Stop Recording button on the video pop is pressed.
- If the Deja Vu checkbox is checked — the DETEXI Archive Viewer playing the recorded alarm video will be launched automatically.
- If the Overwrite in List checkbox is checked — a new alarm from the same camera will overwrite previous in the Alarms List.
- Check the Log-Alarm checkbox to keep track of all Network Client notification alerts received by the Client. Local log file will be created.
— Configure Notification — Phone —
Configure Notification
Phone
- Phone notification calls a user-defined phone or pager and plays alarm-specific or a user-defined WAV file or text-to-speech message. Has the ability to attempt multiple times on failure.
When
New — Notification — Phone is selected the right panel will be populated with configuration settings specific to the
Phone notification.
Configure the notification —
- Configure Phone Notification
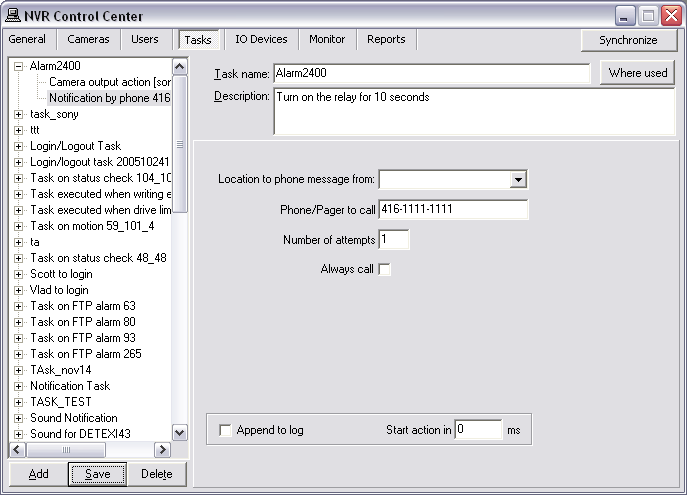
When the trigger condition is met a
Phone notification alerts an operator or an authorized person by sending a user-defined notification to a phone.
- Select a location from the Location to phone message from: drop-down list if provided (for advanced users).
- The NVR Alarm Central service can run on any computer without the DETEXI NVR.
- If there is more than one location running the Alarm Central service the Location to phone message from: list will be provided for the selection.
- By default (if not other location is selected) a message will be phoned from the NVR Server.
- Enter a required Phone/pager to call number.
- Enter Number of attempts.
- The Send always checkbox can be checked ...
- Multiple Phone notifications can be created under one task. At least one Send always checkbox must be checked.
- Check Append to log checkbox to append notification specific information to the existing log file each time when Phone notification is initiated (optional).
- If necessary, enter a Start action in time(ms) — a delay between trigger condition detection and action initialization.
- In order to provide access control and activity (audit) logging the information about any action or notification initiated in the system can be appended to the system log.
— Configure Notification — eMail —
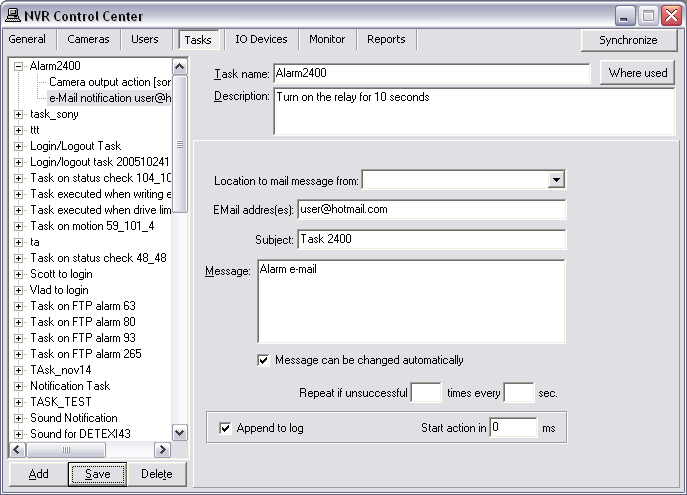
Configure Notification
eMail
- eMail notification sends alarm-specific or user-defined emails to one or more user-defined email addresses. Has the ability to attempt multiple times on failure.
When
New — Notification — eMail is selected the right panel will be populated with configuration settings specific to the
eMail notification.
Configure the notification —
- Configure eMail Notification
When the trigger condition is met an
eMail notification alerts an operator or an authorized person by sending a notification to one or more user-defined email addresses.
- Select a location from the Location to mail message from: drop-down list if provided (for advanced users).
- The NVR Alarm Central service can run on any computer without the DETEXI NVR.
- If there is more than one location running the Alarm Central service the Location to mail message from: list will be provided for the selection.
- By default (if not other location is selected) a message will be mailed from the NVR Server.
- Enter a required Subject line and Message.
- Check the Message can be checked automatically checkbox to allow a user-defined message to be replaced to the automatic alarm specific message (optional).
- Enter a number of attempts and the retry attempt interval in the Repeat if unsuccessful.
- Check Append to log checkbox to append notification specific information to the existing log file each time when eMail notification is initiated (optional).
- If necessary, enter Start action in time(ms) — a delay between trigger condition detection and action initialization.
- Before using the e-mail notification task all necessary settings for sending e-mail (SMTP settings and e-mail account settings must be setup in the NVR Alarm Listener).
— Configure Notification — Speak —
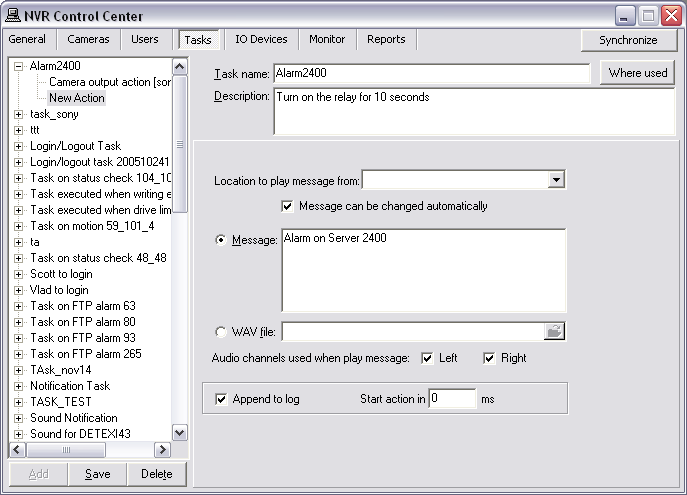
Configure Notification
Speak
- Speak notification plays alarm-specific or a user-defined WAV file or text-to-speech message on the NVR Server or any other computer running the NVR Alarm Central service.
When
New — Notification — Speak is selected the right panel will be populated with configuration settings specific to the
Speak notification.
Configure the notification —
- Configure Speak Notification
When the trigger condition is met a
Speak notification alerts an operator by playing a
wav file or text-to-speech message.
- Select a location from the Location to play message from: drop-down list if provided (for advanced users).
- The NVR Alarm Central service can run on any computer without the DETEXI NVR.
- If there is more than one location running the Alarm Central service the Location to play message from: list will be provided for the selection.
- By default (if not other location is selected) a message will be playing on the NVR Server.
- Select a Message radio button and enter a message to speak;
— OR —
select a WAV file: radio button and enter the wav file name (or press the browse button and browse to the directory containing the file to select it).
- Check the Message can be checked automatically checkbox to allow a user-defined message to be replaced to the automatic alarm specific message (optional).
- Specify Audio channels used when play message — check Left, Right or both checkboxes.
- Check Append to log checkbox to append notification specific information to the existing log file each time when Speak notification is initiated (optional).
- If necessary, enter a Start action in time(ms) — a delay between trigger condition detection and action initialization.
- In order to provide access control and activity (audit) logging the information about any action or notification initiated in the system can be appended to the system log.


 DETEXI® Network Video Management System


